
A DIY Rag Wreath is a great way to add some festive color to your home. Learn how to make your own rag wreath with this simple tutorial!
Chances are, if you do any kind of sewing, you are sitting on a mountain of fabric scraps. Ask me how I know.. I have bags and bags of scraps – odds and ends of fabric that I’m too scared to toss.
You’ll be thrilled to know that you can use this fabric beautifully to make some of the most festive holiday decor. Fabric Ball Ornaments are one of my favorite ways to use up these scraps. But you can also make a cute Fabric Rag Wreath that’s perfect for any time of the year.
Pick out a holiday fabric – or, aim for something bright and cheery to welcome spring. You can even mix and match coordinating fabrics for a nice change, too.
Although a rotary cutter and mat are not necessary for this project, they certainly make cutting the fabric a lot easier. Use a coupon at JoAnn or Hobby Lobby to pick up a rotary cutter and mat. It’s well worth the investment and you’ll wonder how you ever lived without each of them!
Buffalo Plaid Fabric Wreath
Materials needed:
Instructions:
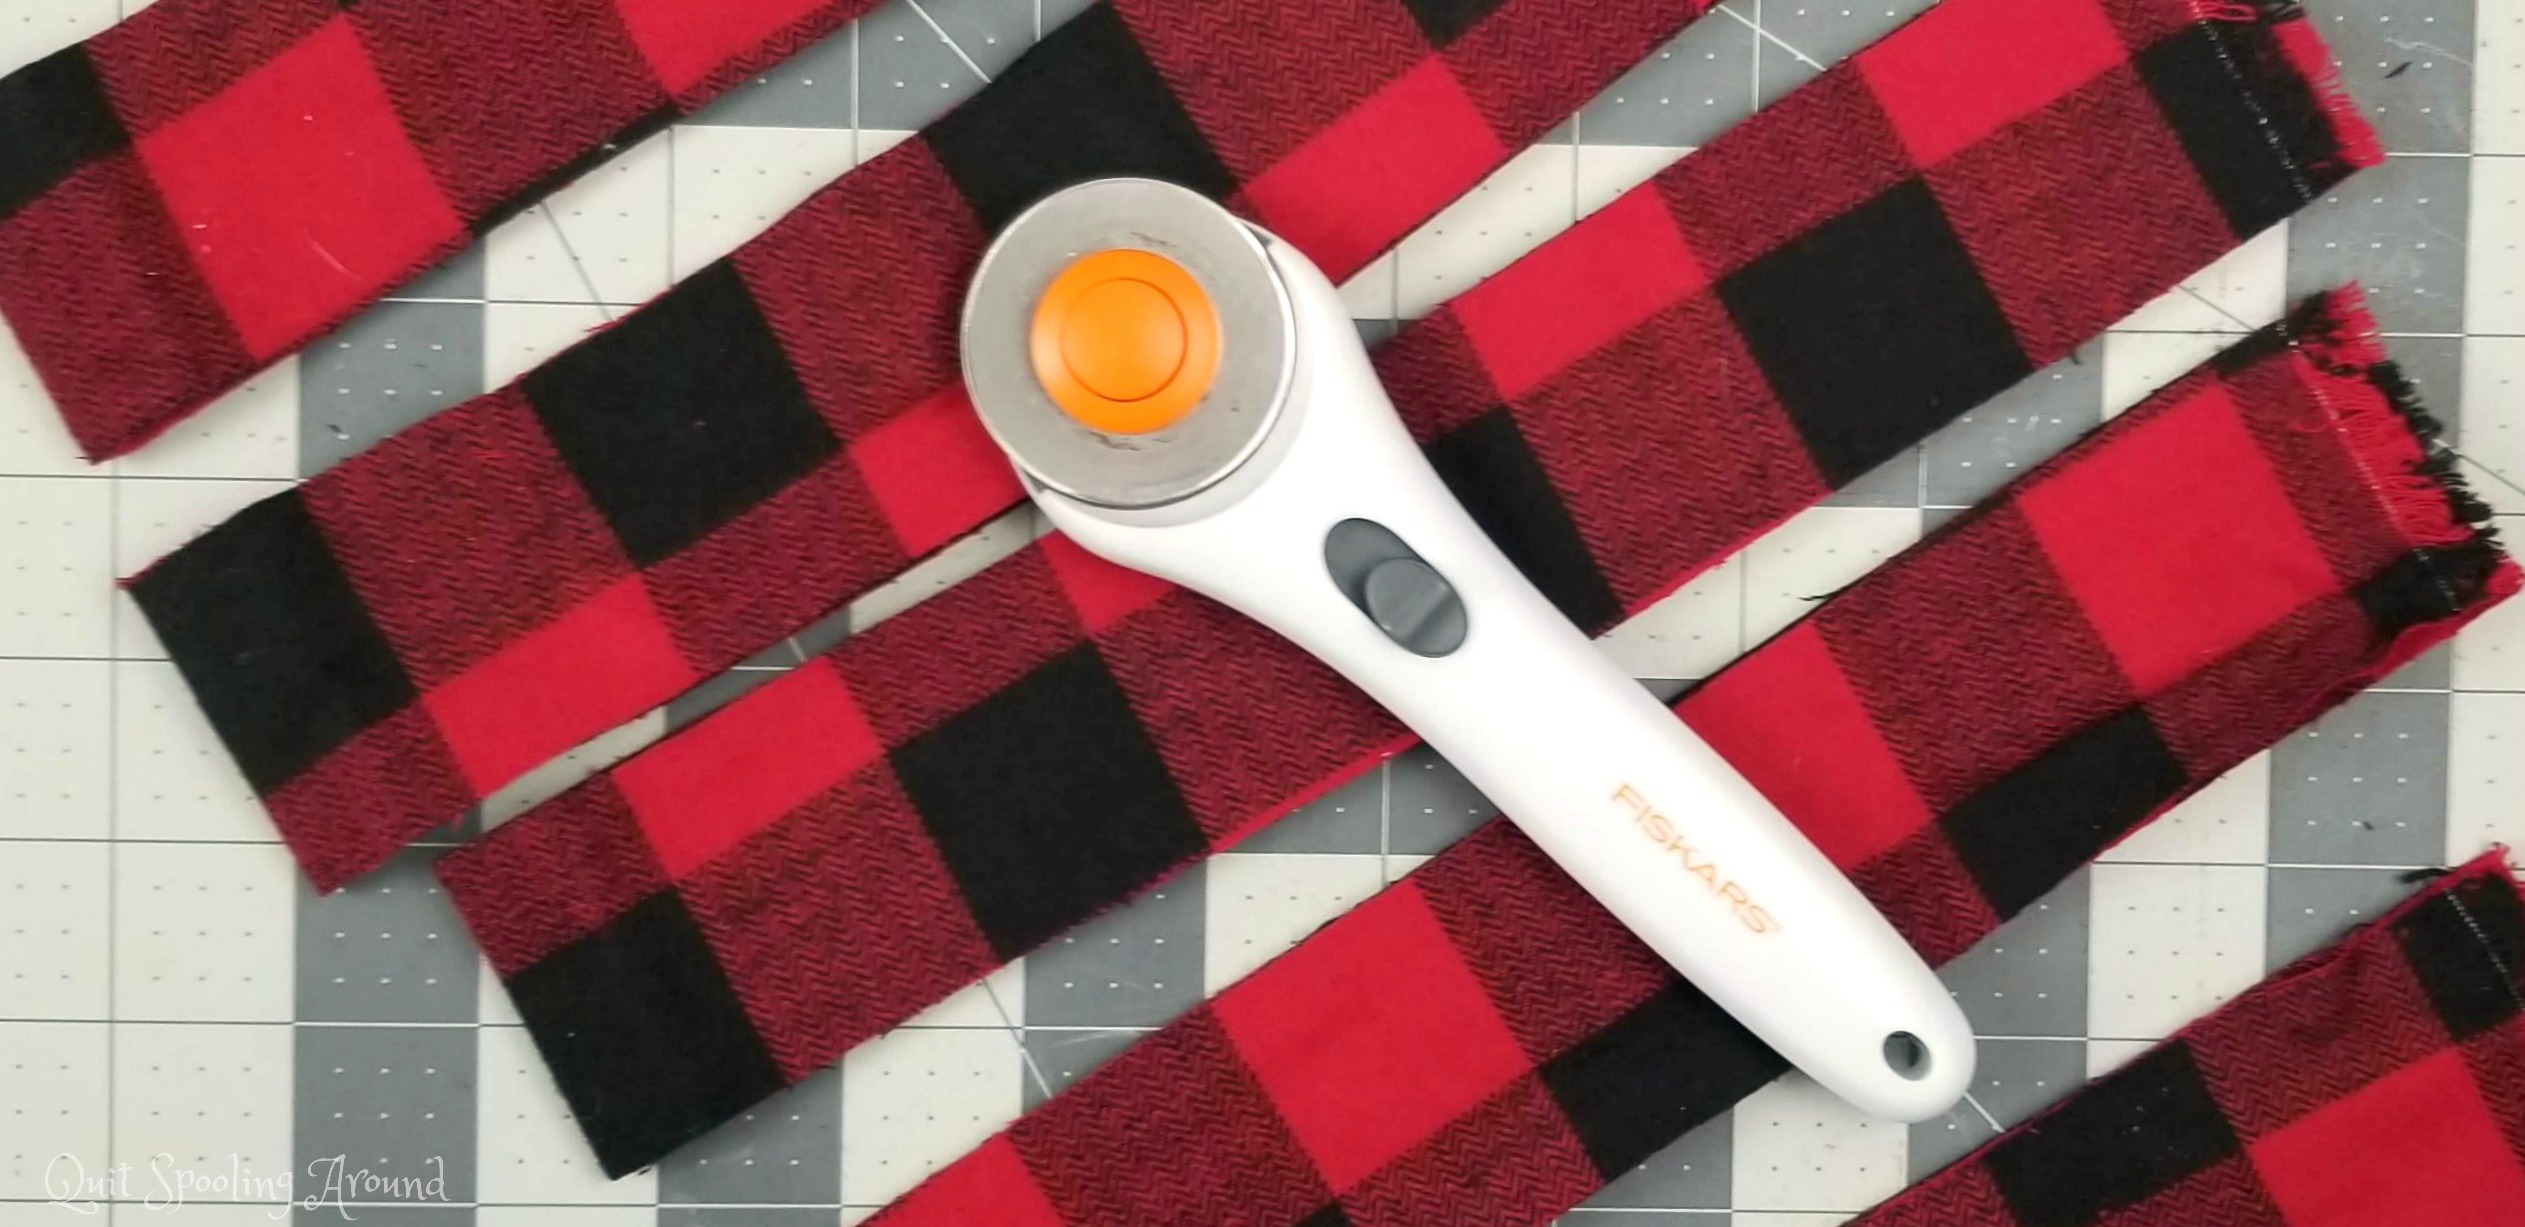
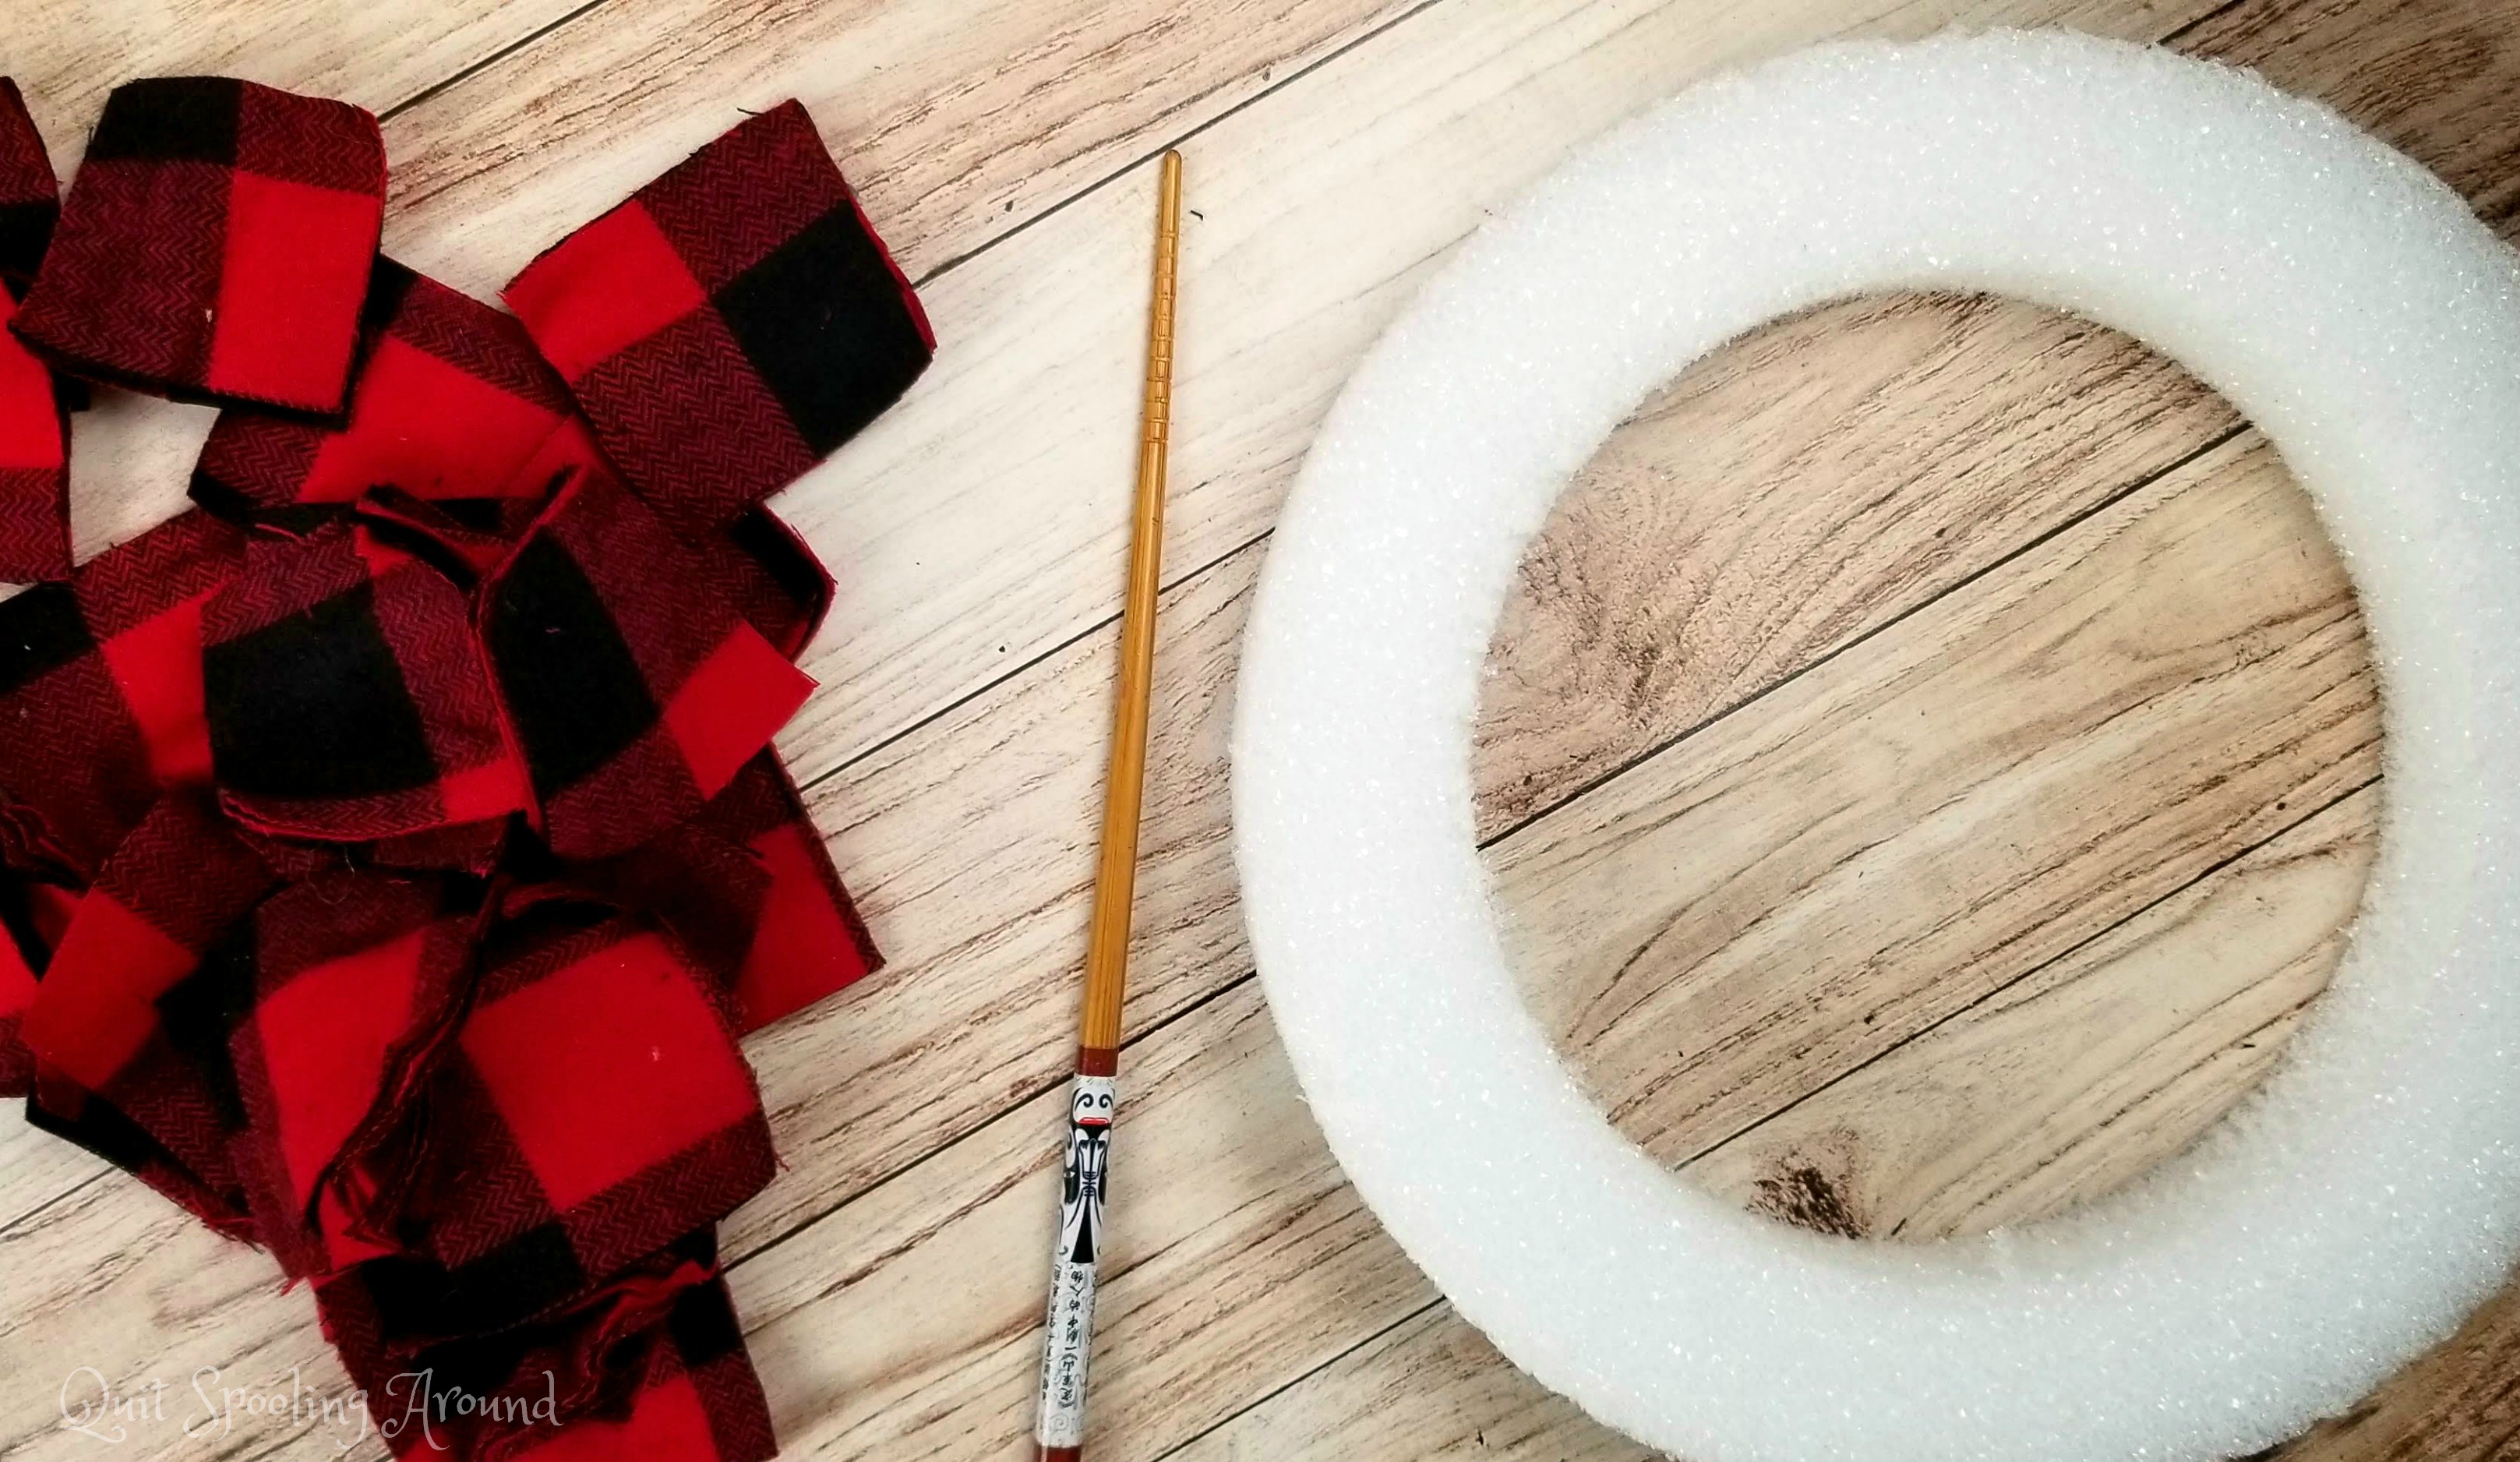
Step 1: Cut your fabric into 2” squares.
Step 2: Make a pile of your squares and grab your chopstick.
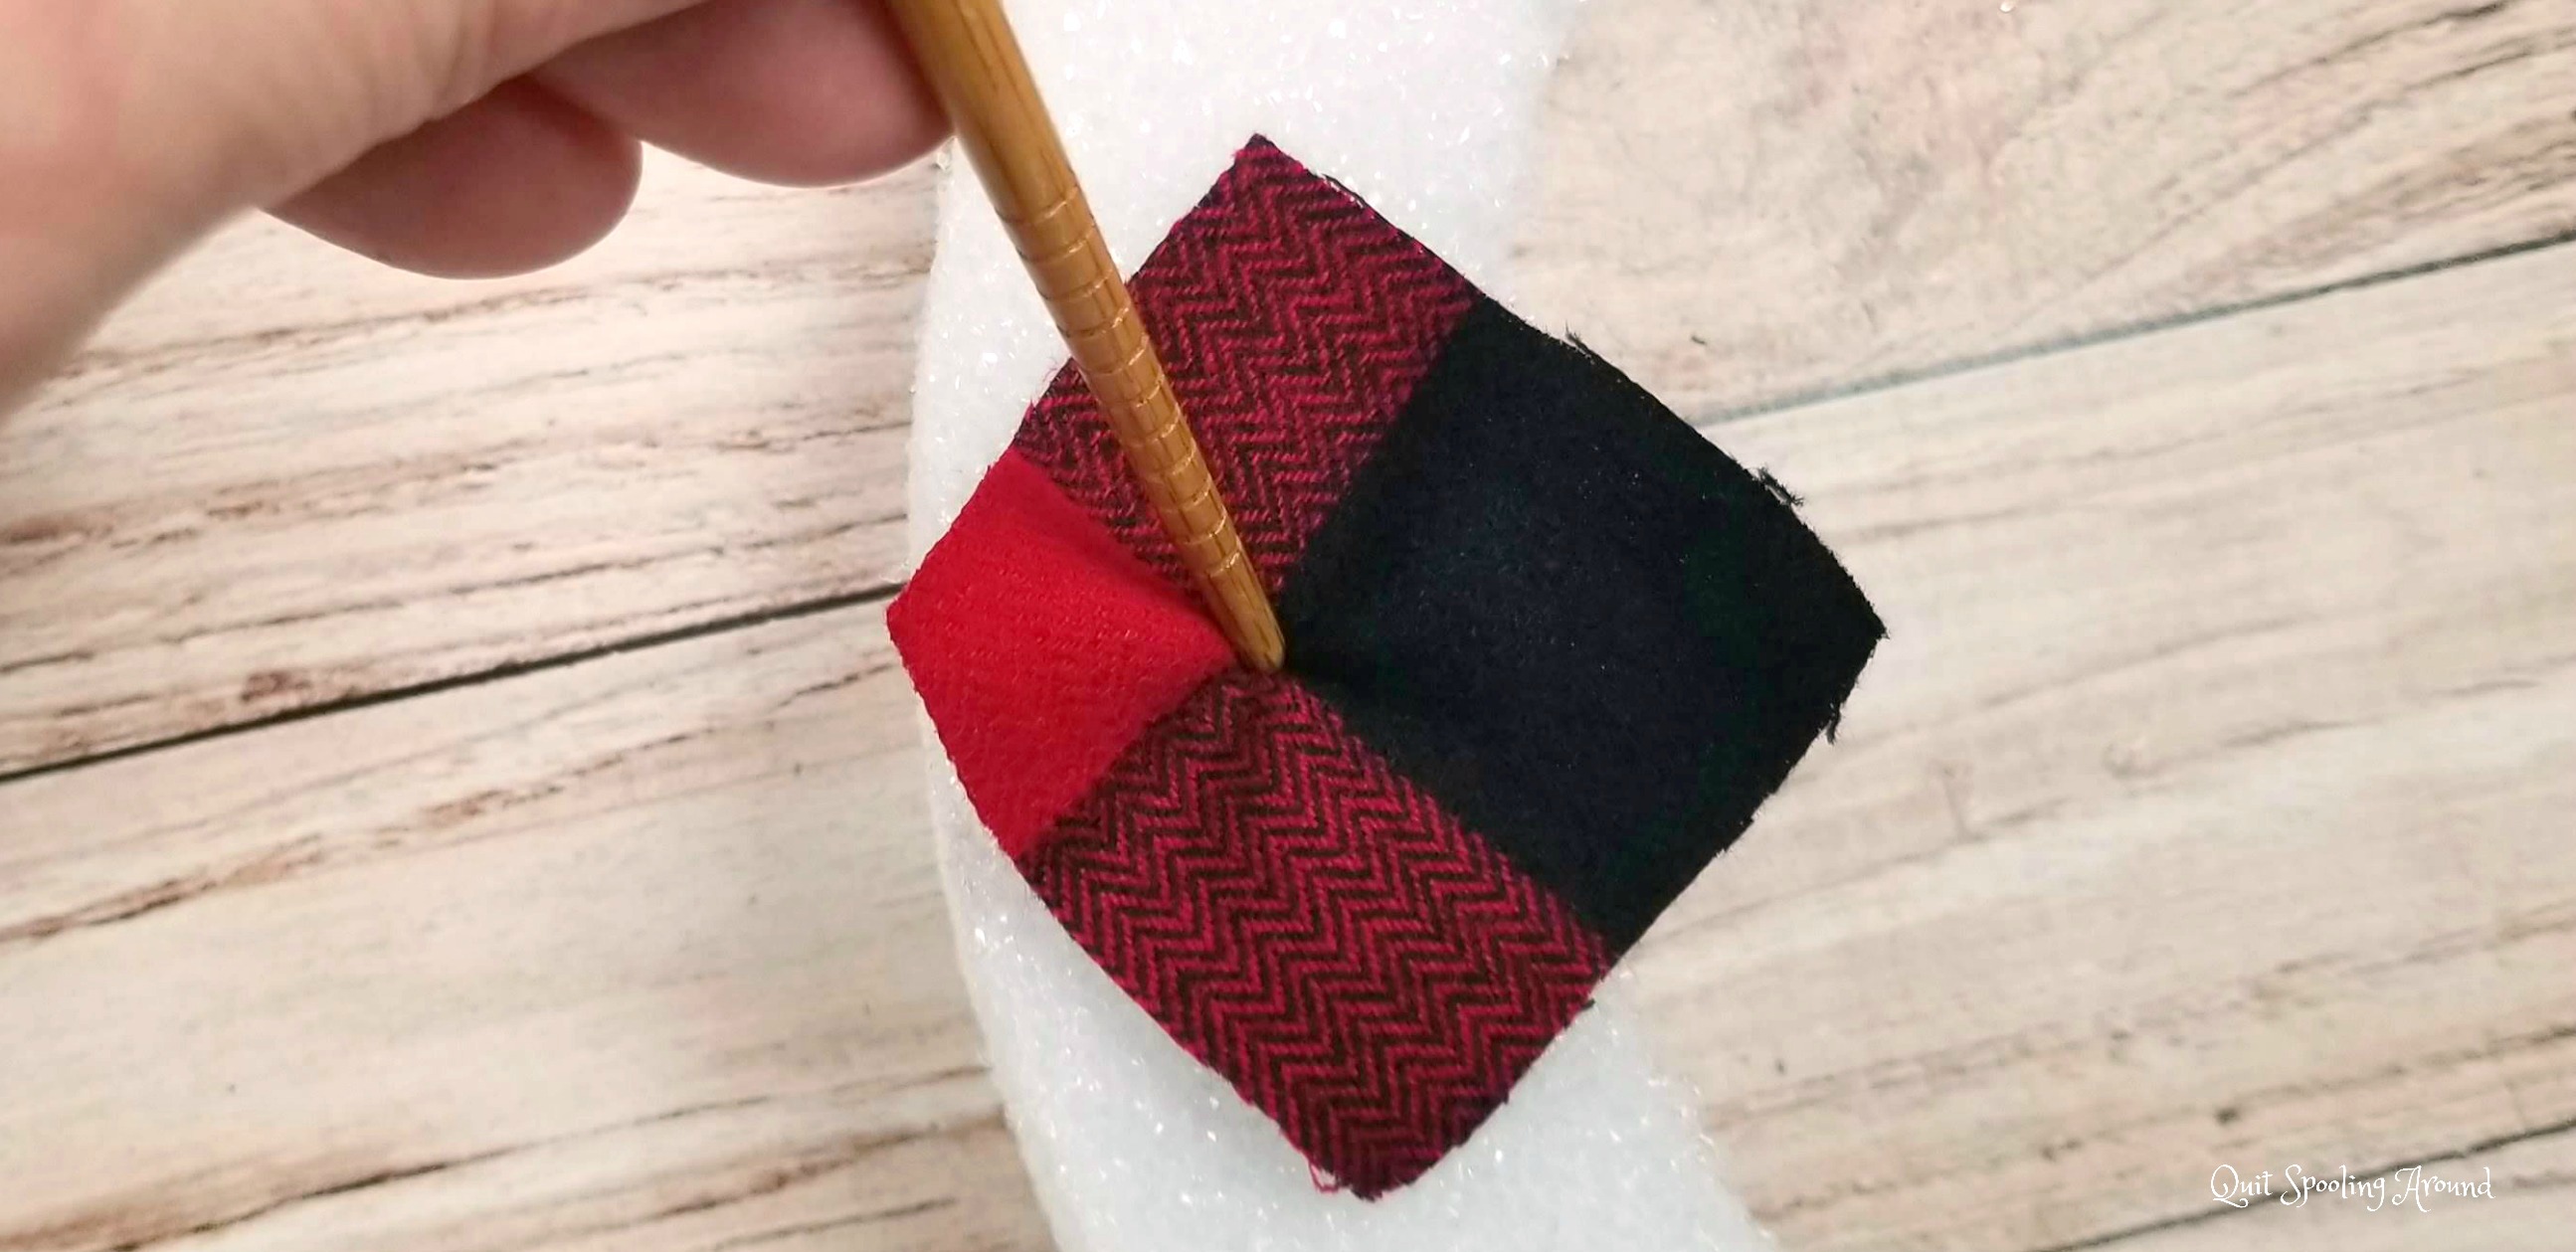
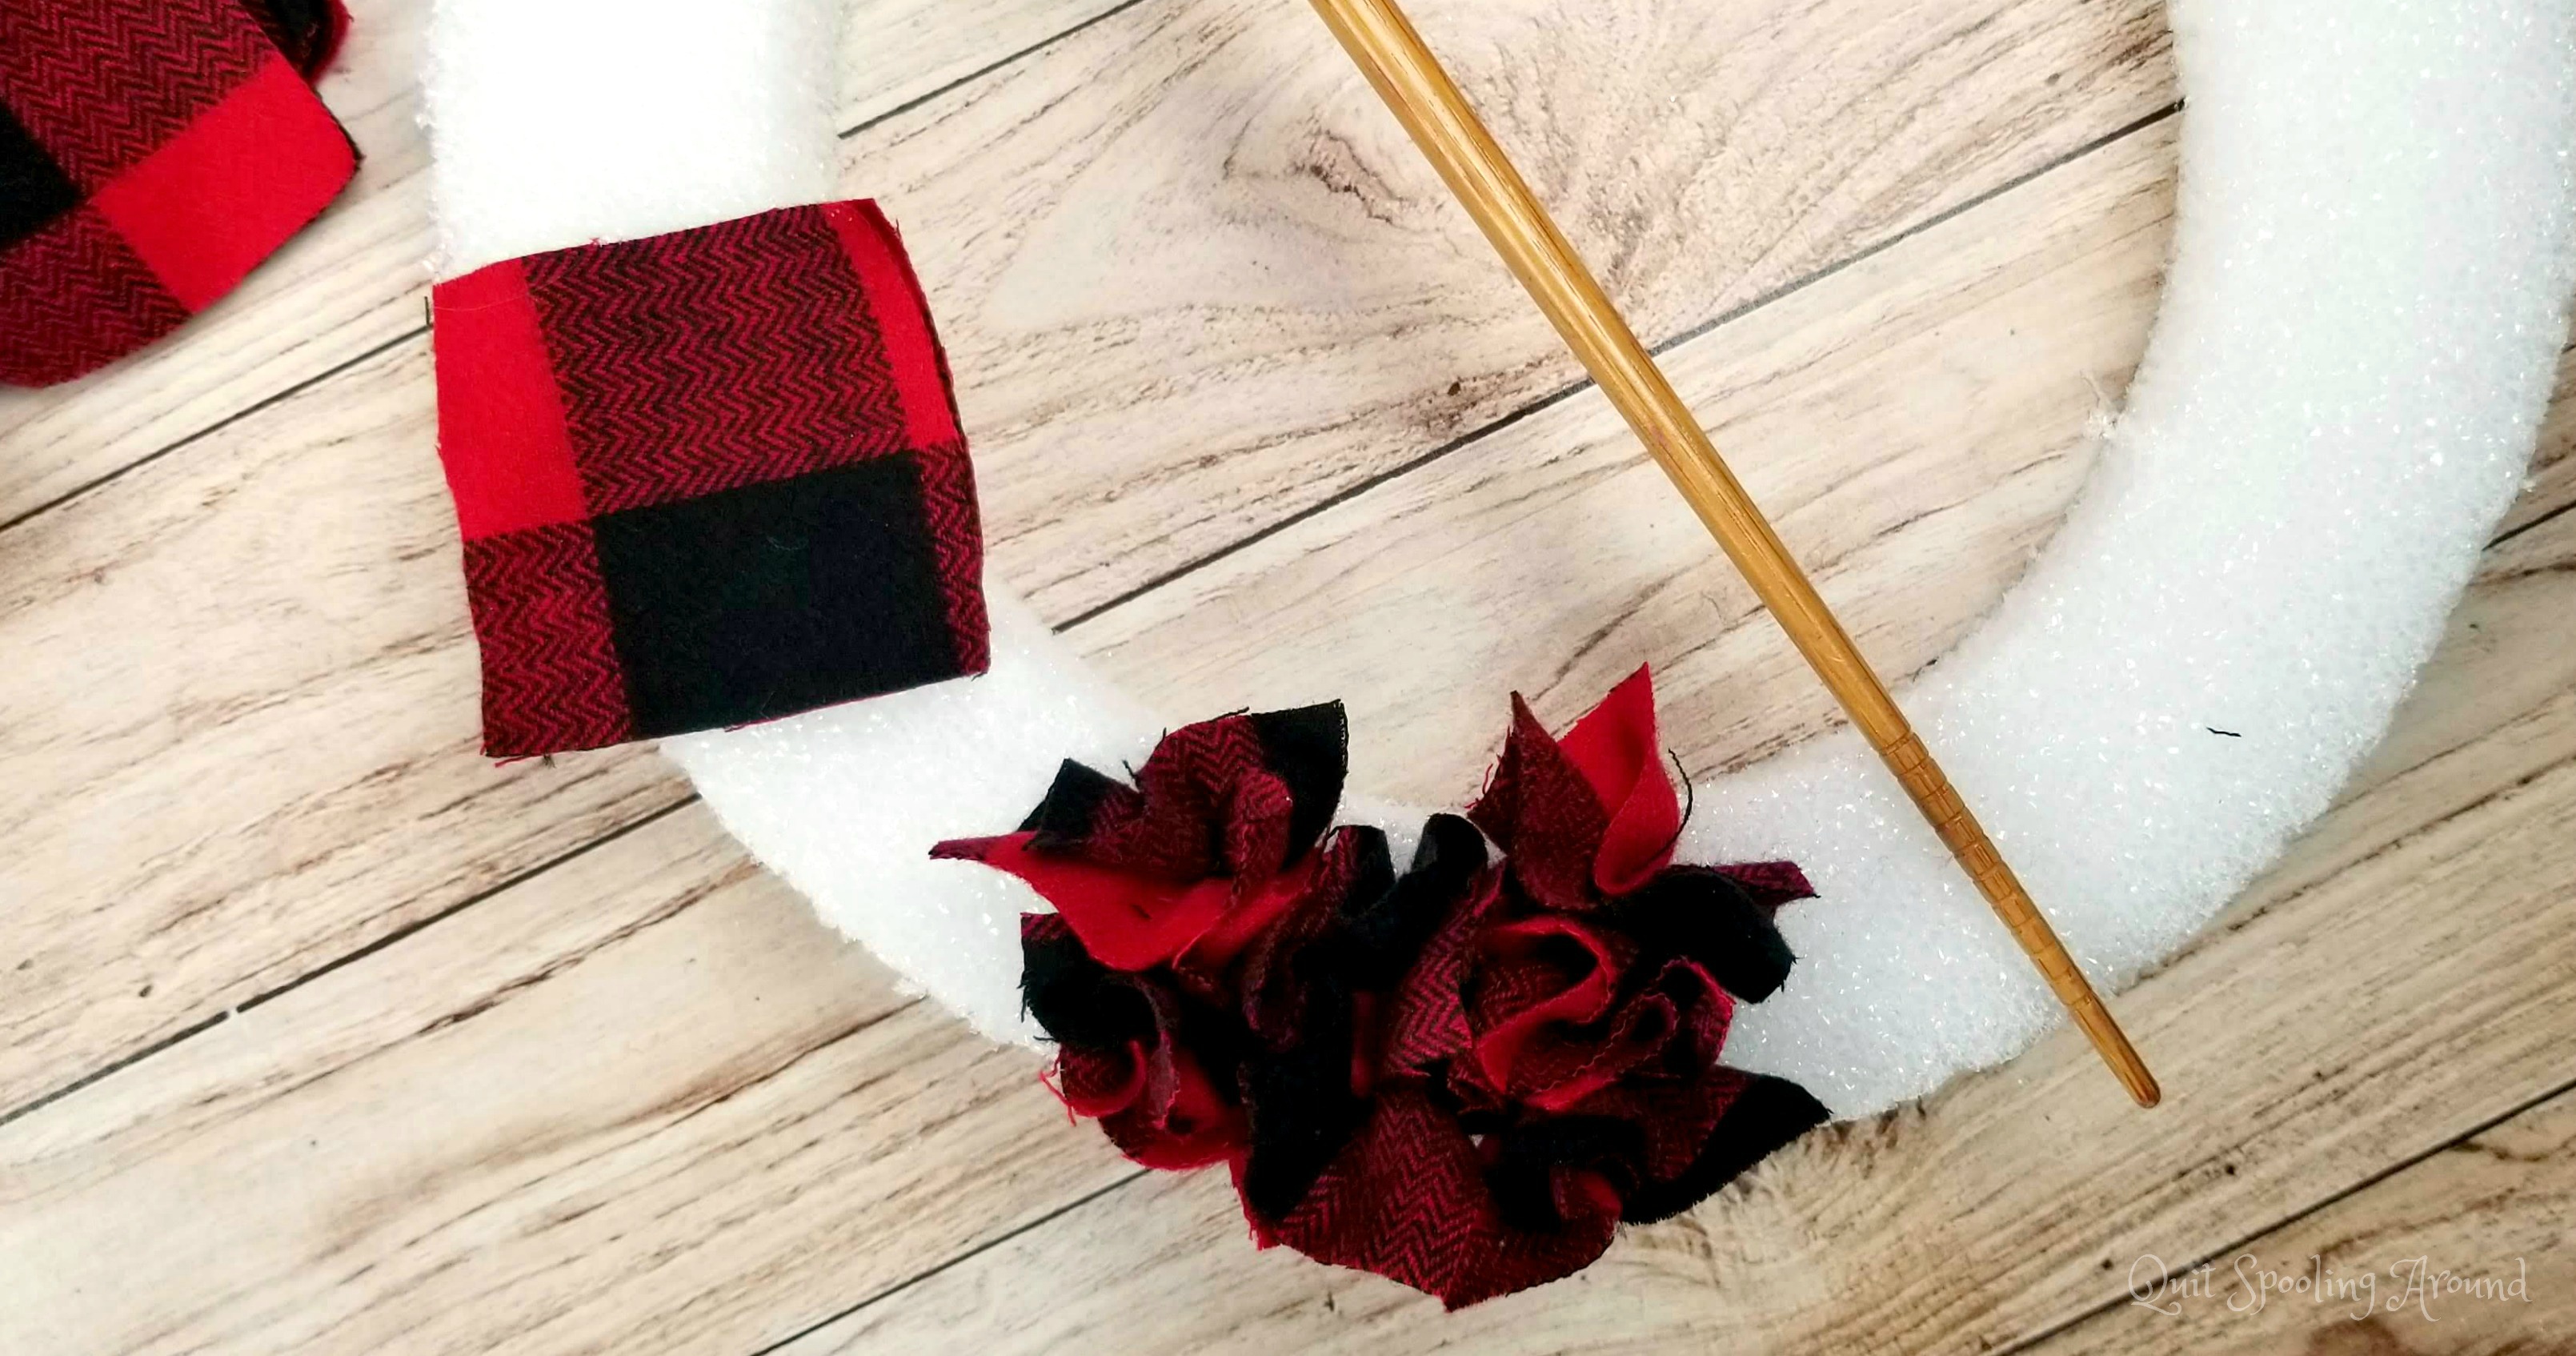
Now – Step 3: Take a square of fabric. Using the pointed end of the chopstick, aim it into the middle of the square of fabric and push into the foam wreath. You will push it in about 1/3 of the way in.
If you push it in too far, you won’t get the fulness you want, but if you don’t push it in enough, the pieces will fall out. You will quickly get into the rhythm and will be able to “feel” the right depth to push the fabric in.

Step 4: Repeat step 3 until the wreath is filled. Cut a length of the ribbon, make a loop and attach with your glue gun or floral pin. Attach decorative embellishment if desired.

Looking for more sewing projects?


Leave a Reply